Chat Bot 正夯,剛好公司的專案有 Line Bot 的應用,所以參考了 不必真的架站也能 5 分鐘實機體驗 LINE bot – 教學 ( by node.js & ngrok ) 、LINE BOT 實戰 ( 原理篇 ) 、LINE BOT 實戰 ( 聊天篇 ) 等文章來進行 Nodejs 的 Line bot 開發實作練習。
開發環境
本次實作有以下階段:
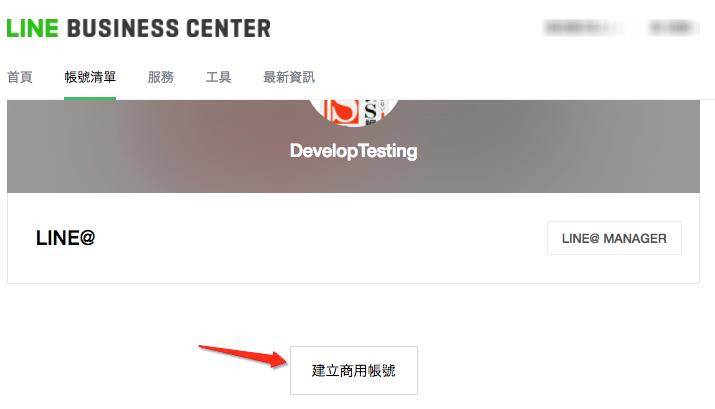
到 LINE Business Center 申請商用帳號。點擊「帳號清單」,再點擊「建立商用帳號」
找到 Messageing API,點擊「開始使用Developer Trial」
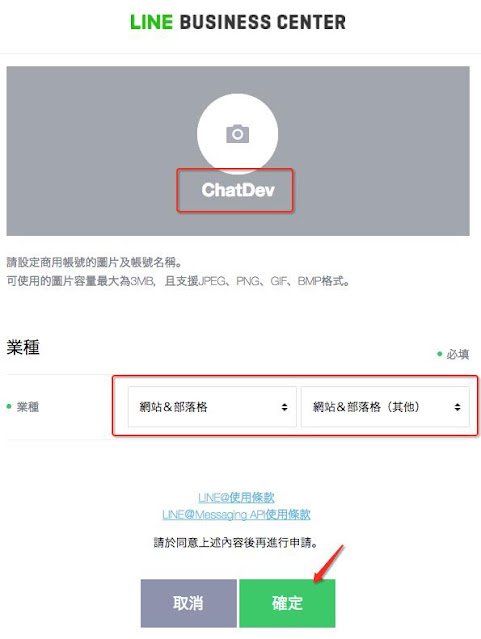
輸入 Bot 的帳號名稱,更換圖片以及選擇業種,再按下確定就會建立機器人專用帳號
在申請完成的頁面下方點擊「前往LINE@MANAGER」
開始使用 API。進入 LINE@ MANAGER 後,在左邊選單 「Settings」-> 點擊「Bot Settings」-> 再按下「Enable API」
https://admin-official.line.me/ 開頭
Bot Settings 的部份要留意 Usable APIs 是否有 REPLY_MESSAGE 及 PUSH_MESSAGE。如果沒有 PUSH_MESSAGE 是不能進行 Bot 主動發訊息給 Client App 的。
Line Bot 需要有 HTTPS 的 webhook service 才能接受及轉發訊息,這時候後端開發必備神器 - ngrok ,可以讓 localhost 使用 HTTPS 的隨機網址,達成 webhook service 測試,省去了必須上傳到 Server 後才能得到測試結果的時間花費。
安裝 Mac 的部份可以在 ngrok 官網下載程式,解壓縮後就可以使用了。或者是丟到 /usr/local/bin,方便之後使用。
Termial 指令
代表把外界的流量導到 localhost 的 8080 port。執行後會有以下畫面:
1
2
3
4
5
6
7
8
9
10
11
ngrok by @inconshreveable (Ctrl+C to quit) Session Status online Account YOUR_ACCOUNT (Plan: Free) Version 2.2.4 Region United States (us) Web Interface http://127.0.0.1:4040 Forwarding http://85ceccf9.ngrok.io -> localhost:8080 Connections ttl opn rt1 rt5 p50 p90 0 0 0.00 0.00 0.00 0.00
按下 Ctrl + C 跳出並停止運作。
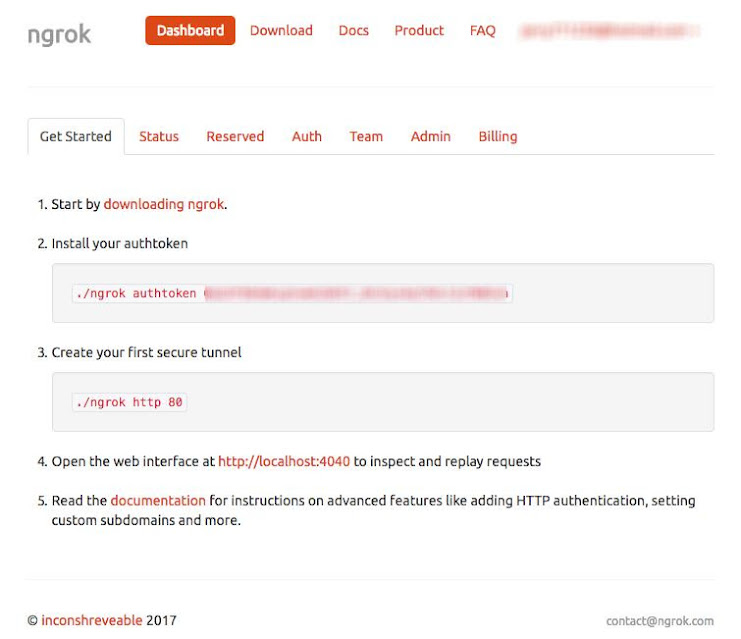
申請 HTTPS protocol 到 ngrok 官網註冊,可以使用 Github 或 Google 登入。
在 Terminal 下執行指令,這樣就可以使用 https 的網址
1
2
3
4
5
6
7
8
9
10
11
12
13
14
15
$ ngrok authtoken {token} $ ngrok http 8080 ngrok by @inconshreveable (Ctrl+C to quit) Session Status online Account YOUR_ACCOUNT (Plan: Free) Version 2.2.4 Region United States (us) Web Interface http://127.0.0.1:4040 Forwarding http://ec041dbf.ngrok.io -> localhost:8080 Forwarding https://ec041dbf.ngrok.io -> localhost:8080 Connections ttl opn rt1 rt5 p50 p90 0 0 0.00 0.00 0.00 0.00
其他指令參考
1 $ ngrok http -auth "user:passwd" 80
轉址到 local domain(修改 /etc/hosts)
1 $ ngrok http -host-header=myweb.dev myweb.dev:80
以上 ngrok 的基本使用是參考 Ngrok – 讓本機也可以開發 webhook 免部署環境的神器
開始建立 Nodejs 專案 1 2 $ mkdir node-line-bot$ cd node-line-bot
建立 package.json 檔案,並修改 “scripts”,增加 "start": "node ."
1 2 3 4 5 6 7 8 9 10 11 12 13 $ npm init { "name": "node-line-bot", "version": "1.0.0", "description": "", "main": "index.js", "scripts": { "start": "node ." }, "author": "Jerry Huang", "license": "MIT" }
安裝模組 linebot 及 express
1 2 3 4 5 6 7 8 9 10 11 12 13 14 15 16 17 18 19 20 21 22 23 24 25 26 27 28 29 30 31 32 33 34 35 36 37 38 39 40 41 42 43 44 45 46 47 48 49 50 51 52 53 54 55 56 $ npm install linebot express --save node-line-bot@1.0.0 /Users/jerryhuang/workspace/practice/nodejs/node-line-bot ├─┬ express@4.15.3 │ ├─┬ accepts@1.3.3 │ │ ├─┬ mime-types@2.1.15 │ │ │ └── mime-db@1.27.0 │ │ └── negotiator@0.6.1 │ ├── array-flatten@1.1.1 │ ├── content-disposition@0.5.2 │ ├── content-type@1.0.2 │ ├── cookie@0.3.1 │ ├── cookie-signature@1.0.6 │ ├─┬ debug@2.6.7 │ │ └── ms@2.0.0 │ ├── depd@1.1.0 │ ├── encodeurl@1.0.1 │ ├── escape-html@1.0.3 │ ├── etag@1.8.0 │ ├─┬ finalhandler@1.0.3 │ │ └── unpipe@1.0.0 │ ├── fresh@0.5.0 │ ├── merge-descriptors@1.0.1 │ ├── methods@1.1.2 │ ├─┬ on-finished@2.3.0 │ │ └── ee-first@1.1.1 │ ├── parseurl@1.3.1 │ ├── path-to-regexp@0.1.7 │ ├─┬ proxy-addr@1.1.4 │ │ ├── forwarded@0.1.0 │ │ └── ipaddr.js@1.3.0 │ ├── qs@6.4.0 │ ├── range-parser@1.2.0 │ ├─┬ send@0.15.3 │ │ ├── destroy@1.0.4 │ │ ├─┬ http-errors@1.6.1 │ │ │ └── inherits@2.0.3 │ │ └── mime@1.3.4 │ ├── serve-static@1.12.3 │ ├── setprototypeof@1.0.3 │ ├── statuses@1.3.1 │ ├─┬ type-is@1.6.15 │ │ └── media-typer@0.3.0 │ ├── utils-merge@1.0.0 │ └── vary@1.1.1 └─┬ linebot@1.3.0 ├─┬ body-parser@1.17.2 │ ├── bytes@2.4.0 │ ├── iconv-lite@0.4.15 │ └── raw-body@2.2.0 └─┬ node-fetch@1.7.0 ├── encoding@0.1.12 └── is-stream@1.1.0 npm WARN node-line-bot@1.0.0 No description npm WARN node-line-bot@1.0.0 No repository field.
建立 index.js 檔案的內容如下
1
2
3
4
5
6
7
8
9
10
11
12
13
14
15
16
17
18
19
20
21
22
23
24
25
26
27
let linebot = require ('linebot' ), express = require ('express' ); const config = require ('./config.json' ), util = require ('util' ); let bot = linebot ({ channelId : 'Line Bot Channel ID' , channelSecret : 'Line Bot Channel Secret' , channelAccessToken : 'Line Bot Access Token' }); const linebotParser = bot.parser (), app = express (); bot.on ('message' , function (event ) { console .log (event); }); app.post ('/webhook' , linebotParser); let server = app.listen (process.env .PORT || 8080 , function ( let port = server.address ().port ; console .log ("My Line bot App running on port" , port); });
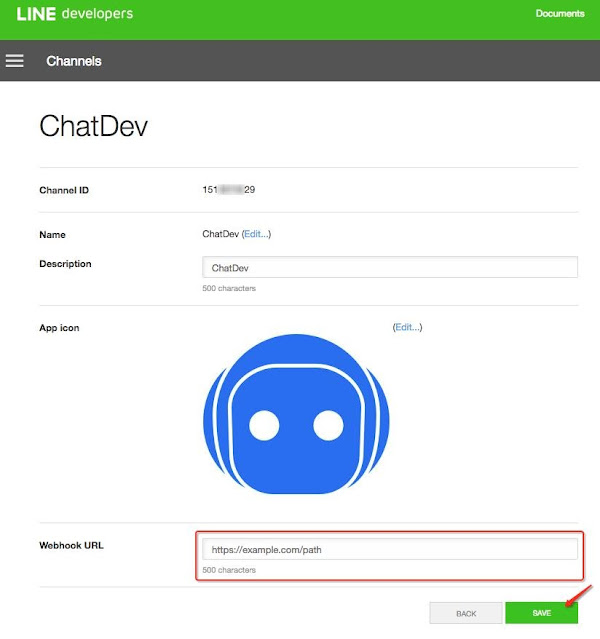
如何取得 Line Bot 的 Channel ID 及設定 Webhook Channel ID、Channel Secret 及 Channel Access Token 可以從 LINE Business Center 進入後取得
取得 Channel ID、Channel Secret 及 Channel Access Token 回到 LINE Business Center 按下 Messaging API 右邊的「LINE Developers」
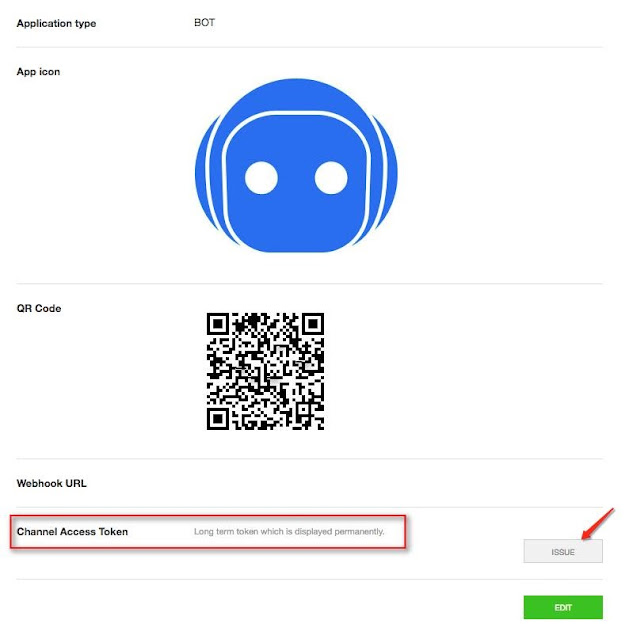
在 LINE developers 下的 “Basic information”,將 “Channel ID”、”Channel Secret”(點選 SHOW 會出現)、 “Channel Access Token” 複製貼到 index.js 裡對應的程式中
點選 ISSUE 會產生 “Channel Access Token”
設定 Webhook URL 同樣在 “Basic information” 下,按下右下角的 “EDIT”,然後將 ngrok 產生的網址以及 index.js 內監聽 post mehtod 的路徑組合 https://ec041dbf.ngrok.io/webhook 貼到 “Webhook URL” 中
回到 Terminal 畫面,啟動 webhook service
再回 LINE developers 的 “Basic information”,按下 Webhoo URL 右方的 “VERIFY” 以驗證是否正確。
Terminal 畫面會有以下資訊
1
2
3
4
5
6
7
8
9
10
11
12
13
14
15
16
17
18
19
20
21
22
23
24
25
26
27
{ replyToken: '00000000000000000000000000000000', type: 'message', timestamp: 1451617200000, source: { type: 'user', userId: 'UdeadbeefdeadbeefdeLINEBOTUSERID', profile: [Function] }, message: { id: '100001', type: 'text', text: 'Hello,world', content: [Function] }, reply: [Function] } { replyToken: 'ffffffffffffffffffffffffffffffff', type: 'message', timestamp: 1451617210000, source: { type: 'user', userId: 'UdeadbeefdeadbeefdeLINEBOTUSERID', profile: [Function] }, message: { id: '100002', type: 'sticker', packageId: '1', stickerId: '1', content: [Function] }, reply: [Function] }
手機 Line App 掃描 LINE developers 的 “Basic information” 畫面中的 QR Code 將 Line Bot 加入,然後輸入文字,測試 Line Bot 是否有正確接收到。
如果有正確收到訊息,則 Terminal 畫面會顯示以下資訊
1
2
3
4
5
6
7
8
9
10
11
12
13
{ type: 'message', replyToken: '98eb2ca92bdb468c9REPLYTOKEN', source: { userId: 'U08cee31d0f3a94CLIENTAPPUSERID', type: 'user', profile: [Function] }, timestamp: 1496462418683, message: { type: 'text', id: '618217MSGID', text: '開發測試Q Q', content: [Function] }, reply: [Function] }
將收到的訊息,回覆給 Client App 修改一下 on ‘message’ 的內容
1 2 3 4 5 6 7 8 9 10 11 12 13 14 15 16 bot.on ('message' , function (event ) { if (event.message .type = 'text' ) { var msg = event.message .text ; event.reply (msg).then (function (data ) { console .log (msg); }).catch (function (error ) { console .log ('error' ); }); } });
記得要重啟 nodejs server 喔 :)
主動發送訊息 讓 server 啟動後 3 秒,發送訊息給 Client App,請在 index.js 加入以下程式,。
1 2 3 4 5 6 7 8 setTimeout (function ( var userId = 'Client App User ID' ; var sendMsg = "push msg to one user" ; bot.push (userId, [sendMsg]); console .log ('userId: ' + userId); console .log ('send: ' + sendMsg); }, 3000 );
參考資料:
Line Bot 的圖片來源